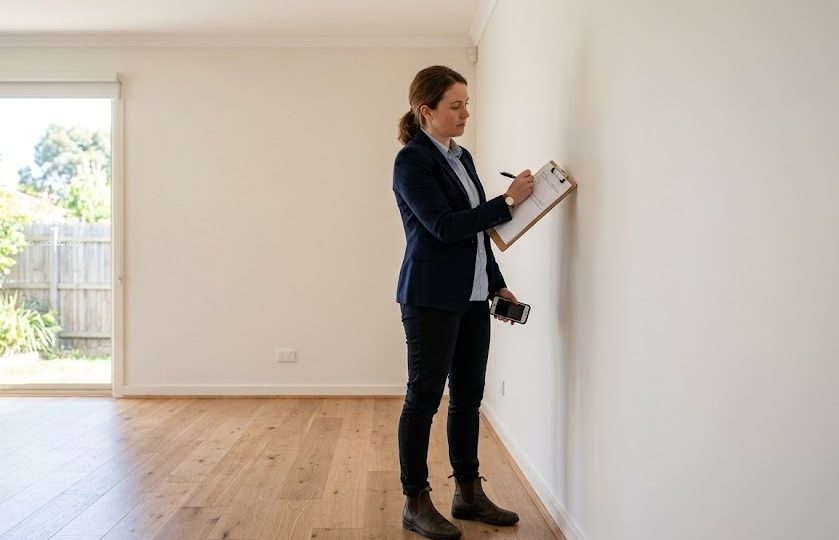
Of all the jobs at the start of a tenancy, the condition report is the one it’s tempting to rush. The tenant’s keen to get the keys, you’re keen to get them in, and ticking “good, good, good” down a form feels like a formality you can knock over in five minutes.
Slow down on this one. It’s worth it.
The entry condition report (some states call it the ingoing inspection or property condition report) is the single most useful thing you’ll do at move-in, because it’s the “before” picture that decides who pays for what at the end. Get it right on day one and the end of the tenancy looks after itself. Skimp on it, and you can find yourself months down the track trying to prove a mark was there before your tenant arrived, with nothing to point to.
The good news? It’s a straightforward job, and once you’ve done one properly you’ll do every one the same way. Here’s how, plus what your state expects and by when.
What an entry condition report actually is
It’s a written record of the condition of your property, room by room, at the moment the tenancy starts. Walls, floors, fixtures, fittings, the oven, the taps, the state of the garden. You fill it in, the tenant checks it and adds anything they disagree with, and you both end up with an agreed snapshot of how the place looked before anyone lived in it.
That snapshot is the whole point. At the end of the tenancy you’ll compare the property against it, and the gap between the two is what you can fairly ask the tenant to put right. No entry report, no fair comparison. It really is that simple.
Why it’s the most important twenty minutes of the tenancy
Think about how a bond dispute actually plays out. The tenant moves out, you notice a cracked tile or a wall that needs repainting, and you want to claim part of the bond to cover it. The tenant says it was already like that. Now what?
If you’ve got a detailed entry report with a photo of that tile looking perfectly fine on day one, the conversation’s over before it starts. If you haven’t, it’s your word against theirs, and the tribunals that handle these disputes tend to side with the tenant when there’s no evidence to the contrary. The bond you were counting on to cover the repair stays with them.
So the entry report isn’t box-ticking. It’s the difference between a claim that sticks and one that quietly falls apart. Twenty careful minutes at the start can be worth a few thousand dollars at the end.
How to fill it in so it actually holds up
The form itself is easy. Doing it in a way that’ll protect you takes a bit of care. Here’s the method:
- Do it while the place is empty and clean, before the tenant moves a single box in. An empty room is easy to assess. A furnished one hides things.
- Go room by room, and don’t forget outside. Every room, plus hallways, the garage, the garden, fences, any shed. If it’s part of what you’re renting, it goes on the report.
- Be specific, never just “good”. “Small scuff, about 10cm, left of the window” is worth something. “OK” is worth nothing when you’re trying to prove a point later. Describe marks, their size, and where they are.
- Photograph and video everything, with the date on it. A dated photo of each room and every existing mark is your strongest evidence by a mile. A slow video walk-through with the date visible is even better. Keep the lot.
- Record what works, as well as what’s damaged. Note that the smoke alarms sound, the taps run, the oven heats, the locks turn. It saves arguments about who broke what.
- Both of you sign and date it, and everyone keeps a copy. The tenant’s signature is what turns your record into an agreed one. Give them the chance to add their own comments too, that’s their right, and it makes the whole thing harder to challenge.
Do those six things and you’ve built something genuinely solid, not just a filled-in form.
Who does what, and by when: every state
The exact steps and timeframes are set by your state or territory, and they differ. The pattern is the same everywhere, though: you complete and provide the report, and the tenant gets a set window to check it and hand back their copy. Here’s the lot.
| State/territory | You provide the report | Tenant checks and returns it within |
|---|---|---|
| NSW | Two copies (or one electronic), filled in before the tenant moves in and given before or when they sign | 7 days of moving in |
| VIC | Before the renter moves in (where a bond is taken) | 5 business days |
| QLD | Entry condition report (Form 1a) at the start of the tenancy | 7 days (from moving in or getting the copy, whichever is later) |
| WA | Two signed copies within 7 days of the tenant moving in | 7 days of receiving it |
| SA | Two copies of the inspection sheet at the start | 14 days |
| TAS | At the start of the tenancy | 2 days of receiving it |
| ACT | Before the tenant moves in | 2 weeks |
| NT | Within 3 business days of the tenancy starting, completed in the tenant’s presence | 5 business days |
Two things to keep in mind as you use that table. If the tenant doesn’t return their copy in time, most states treat them as having accepted your version, which sounds like it’s in your favour but cuts both ways, so don’t rely on it. And the deadlines are real: in WA, for instance, failing to give the tenant the report is an offence that can carry a $5,000 penalty. Getting it to them on time is not optional.
For your state’s official form and the fine print, go straight to the source: NSW Fair Trading, Consumer Affairs Victoria, the Queensland RTA, Consumer Protection WA, Consumer and Business Services SA, Consumer Affairs Tasmania, the ACT Government, and NT Consumer Affairs.
The easy way: doing it on your phone
If the thought of a paper form, a separate camera roll, and keeping track of who signed what is exactly the sort of faff that’s put you off self-managing, here’s the part worth knowing.
You can do the whole thing on your phone. PropertyNow’s digital condition reports let you walk the property room by room, attach photos as you go with the date baked in, and have the tenant complete and sign their side electronically. Everything’s stored in one place, so when the tenancy ends in two or three years and you need to compare, it’s all sitting there ready, not lost in an old email or a drawer.
That’s really the theme of self-managing done well. The rules are learnable and the job’s doable, and where a tool takes the fiddly, easy-to-lose bits off your hands, you let it. You keep full control of your property without the paperwork running your life.
How it all connects
The entry report doesn’t work alone. It’s one half of a pair, and its other half is the end-of-tenancy condition report you’ll complete when the tenant moves out. The exit report is only as good as the entry report it’s measured against, so the care you put in on day one is what makes the exit straightforward and your bond claim, if you need one, stick.
In between the two, your routine inspections every few months add dated photos to the same record, so by move-out day you’re comparing against a whole tenancy’s worth of evidence, not just day one.
It also sits inside the bigger job of renting out your property privately: screen your tenant properly, get the lease right, document the property with the entry report, and collect the bond the way your state requires. Four steps, all of them doable, and each one making the next one easier.
The bottom line
The entry condition report is dull to fill in and priceless to have. It’s the “before” that makes everything at the end fair: what you can claim, what the tenant gets back, and who’s right if the two of you ever disagree.
So take the twenty minutes. Go room by room, be specific, photograph everything with the date on it, and get both signatures. It’s bread-and-butter stuff, entirely doable yourself, and it’s the cheapest insurance policy in the whole tenancy.
Do your condition report on your phone
Photos with the date baked in, the tenant signs their side electronically, and it’s all stored ready for move-out day. PropertyNow’s digital condition reports take the fiddly bits off your hands.
Frequently asked questions
Do I legally have to do an entry condition report? In practice, yes. Every state and territory requires the landlord to provide one at the start of a tenancy where a bond is taken, and there are penalties for not doing it (in WA, up to $5,000). Beyond the law, it’s your main evidence in any bond dispute, so it’s firmly in your own interest.
When should I fill it in? Before the tenant moves in, while the property is empty and clean. That’s when it’s easiest to assess honestly, and it’s what most states require. The tenant then gets their state’s set window to check it and add comments.
What if the tenant doesn’t return their copy in time? In most states, if the tenant doesn’t return the report within the deadline, they’re taken to have accepted your version. That sounds handy, but don’t lean on it, a report both of you have signed is far stronger than one only you filled in.
How detailed does it need to be? Detailed. “Good” tells a tribunal nothing. Describe each mark, roughly how big it is, and where it is, and back it up with dated photos or video. The more specific your record, the more it’s worth if there’s ever a disagreement.
Do photos count on their own, or do I still need the written report? You need both. The written report is the required document and the agreed record; the photos and video are the evidence that brings it to life. Together they’re close to unarguable. Apart, each is easier to challenge.
Is a digital condition report valid? Yes. Electronic condition reports and signatures are accepted in every state, and they make the job quicker and the records easier to keep. That’s exactly how PropertyNow’s digital condition reports work.
Related stories
- How to write an end-of-tenancy condition report (and protect your bond claim)
- Residential lease agreements explained: a state-by-state guide
- How to screen tenants: a landlord’s guide
- How to rent out your property privately: the step-by-step guide
By the PropertyNow team. This article is general information, not legal advice. Condition report requirements, forms and timeframes are set by each state and territory and can change, so check your relevant authority (linked above) for the current detail before acting.