Real estate photography tips from the professionals themselves
Your photos are the first thing a buyer sees, and often the only thing that decides whether they click your listing or scroll past it. Buyers tend to read poor photos as a poor property, fairly or not. So getting the images right is one of the highest-value jobs in the whole campaign, and the good news is you can do a lot of it yourself.
When we put this guide together we asked three working property photographers how they shoot a house properly. Here’s what they told us, plus the shot list buyers expect to see and a few rules that keep your photos looking sharp rather than amateur.
Style each room before the camera comes out
Most professional photographers prep a room before they take a single photo. That means clearing clutter, moving furniture that blocks the flow, and setting each space so the eye moves through it easily. A tidy, considered room photographs far better than a lived-in one, so this step does more for your final images than any camera trick.
A few quick wins before you shoot:
- Clear benchtops, coffee tables and bedside tables down to one or two nice objects.
- Open blinds and curtains fully and turn on every light, including lamps.
- Put away bins, cords, pet bowls, toiletries and the drying rack.
- Add a little warmth: fresh flowers, a bowl of fruit, folded towels, a couple of cushions.
If your home is empty, a photographer can add virtual furniture so rooms don’t read as cold and bare. And if the whole thing feels like a big job, our room-by-room guide to cleaning and prepping a house for sale walks through it in order.
Find the best angle for each room
Property comes in all shapes and sizes, and no two rooms are the same. Use the furniture, windows and layout to lead the eye inward through the space. Shooting from behind a couch, for example, blocks that flow and makes the room look smaller than it is.
On composition, Stefan Young, real estate photographer and director of Capture Real Estate, advises:
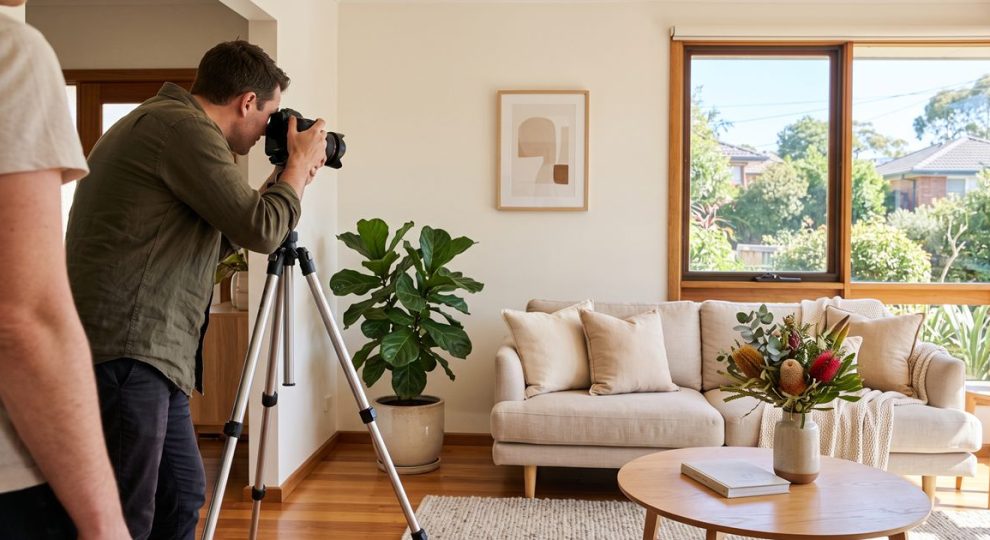
“The wider the shot the better. You want to capture as much of a room as possible, so shooting wide angle from corner to corner works well. The height of the camera is also important. At Capture Real Estate, we tend to position our tripods at ‘light switch’ level, this way you won’t have empty spaces of ceiling or floor, you capture the right amount of detail in a room.”
Corner to corner, at light-switch height, on a tripod so the shot is level and sharp. That one habit fixes most amateur interior photos.
Work the natural light
Pick the time of day that suits the room. It depends which way the property faces and how much natural light you get, so enhance the light you have and avoid shooting straight into the sun.
Phil Blackman of Pixelworx Images puts it this way:
“It’s about the hardness, softness and colour of the light. Often, the light can be better later or earlier in the day when the sun is lower in the sky and less severe. When the sun is glary, it creates too much contrast between light and dark spaces.”
For exterior shots, a dusk photo with the house lights on can look genuinely special. Amy Hope, director of Realscope Photography, takes many of hers at dusk:
“This creates a sense of glamour and adds visual impact. It needs to be early enough to have natural lighting so you can capture all the detail in the garden, but still have the warm glow from your windows.”
The photos buyers expect to see
Buyers have a mental checklist when they open a listing, and a gap in it makes them suspicious. Leave out the bathroom and they assume you’re hiding something. Cover this set and you’ve given them the full picture:
- A hero exterior shot (the front of the house, at its best light).
- The kitchen.
- The main living area.
- Each bedroom.
- The bathroom (and ensuite, if there is one).
- The backyard, deck or outdoor area.
- A standout feature if you have one: a view, a fireplace, a pool, a big pantry.
Aim for quality over volume. A tight set of strong photos beats a flood of weak ones, and a listing with too few images looks thin while a listing with fifty near-identical shots buries the good ones.
A few DIY rules that keep photos looking sharp
If you’re shooting the home yourself, these are the ones that separate a clean listing from an amateur one:
- Hold the phone or camera horizontally, never vertically. Portrait shots crop badly on the portals.
- Use a tripod at light-switch height so every shot is level and free of blur.
- Shoot wide, corner to corner, to capture the whole room.
- Shoot in good light, early or late rather than harsh midday glare, with blinds open and lights on.
- Watch for reflections: keep yourself out of mirrors, windows and shiny splashbacks.
- Crop to 4:3 (four wide to three tall). Other ratios don’t display well on realestate.com.au.
- Adjust brightness and contrast gently to lift a photo, but keep it true to the room. Buyers who feel misled at the inspection walk away.
Once you’ve taken them, our guide to cropping, resizing and rotating your photos covers getting them ready to upload, and the photos work hardest when they’re paired with a strong listing, so it’s worth reading how to write a real estate ad that sells alongside this.
The bottom line
Great photos take a bit of planning, a tidy house and a little know-how, but none of it is out of reach for a private seller. Style the room, shoot wide and level from light-switch height, work with the light, and cover the shots buyers expect. Do that and your listing stands shoulder to shoulder with anything an agency would put up.
And if you’d rather hand the camera to someone who does this every day, professional photography is available as an add-on with your PropertyNow listing.
Would you rather leave the camera to someone else?
Professional photography is available as an add-on with your PropertyNow listing, shot by photographers who do nothing but property all day.
Frequently asked questions
Can I take my own real estate photos, or do I need a professional? You can shoot them yourself with a phone or camera, a tripod and good light. A professional is worth considering for a high-value or hard-to-shoot home, but a careful DIY job on a well-presented house photographs well.
What time of day is best for property photos? For interiors, bright but not harsh light, so mornings or later afternoon rather than midday glare, with blinds open and lights on. For a hero exterior, dusk with the house lights on can look striking, as long as there’s still enough daylight to show the garden.
How many photos should a listing have? Enough to cover every main room plus the exterior and outdoor areas, without padding. A tight set of strong images beats a flood of weak or repetitive ones.
What size should real estate photos be? Crop to a 4:3 ratio (four wide to three tall), which displays cleanly on realestate.com.au and the other portals. Avoid portrait orientation.
Do professional photos really help sell a house? Photos are the first thing buyers judge a listing on, so strong images get more clicks and more enquiries. Whether you shoot them yourself or hire someone, the images are worth getting right.
Related stories
- Cleaning your house before sale: a room-by-room checklist
- How to write a real estate ad that sells
- Cropping, resizing and rotating your photos
By The PropertyNow Team